

Our Favorite Paint Colors for Old Houses
Get inspired by these stunning rich hues, soft neutrals, timeless whites and whole-room palettes that make old houses shine.
East Isles Victorian project
The right paint color can change everything—making a room feel brighter, cozier or more connected to its details. In old houses, we love shades that work with natural light, flatter original features and add effortless character to a room. From deep, dramatic hues to soft neutrals, here are a few of our favorites, shown in real homes we’ve worked on.
Rich Paint Colors For Old Houses
Older homes wear saturated, moody shades beautifully. Thick plaster walls, natural wood trim, and rooms with history behind them can carry color in a way new builds often can’t. Rich hues cozy up a space and feel timeless—plus, they’re a great way to play up the character that makes old homes so special.
Because older homes often have more defined rooms (no open floor plans here), you can experiment with different colors from space to space. We love this—it creates opportunities for personality and contrast. Just be sure to think through the overall palette so that, even if each room has its own tone, everything still feels cohesive as you move through the home.
Blues
Greens

Pine Grove (BM) in our Lyndale Craftsman project
Yellows
Reds
Purples & Pinks

East Isles Victorian project
Soft Neutral Paint Colors For Old Houses
Neutrals might not sound exciting, but in old homes, they’re often the secret to letting original details take center stage. Plaster walls, intricate trim and natural wood floors all look great against shades that are soft, layered and just a touch complex.
The trickiest thing with neutrals? Light changes everything. The direction your windows face—and even the time of day—can shift how a color reads. We always test a few options before committing to make sure the tone feels just right in the space!
Cool Neutrals
They’re perfect for south-facing rooms, bright kitchens and bathrooms, or anywhere you want a light backdrop that won’t feel stark.
Warm Neutrals
These warm neutral shades bring a hint of warmth without feeling too yellow-y. They pair beautifully with original wood trim or can soften the edges of darker, more saturated accent colors.
Mendota Heights project
Warm Whites
Not every “white” is created equal. These options have subtle undertones that work especially well in homes where pure white would feel too cold.
Cool Whites
We rarely recommend a true cool white, but these are a few that don’t turn too icy. They can work to balance a space that naturally has a lot of warmth through the sunlight, trim, furnishings and more.

Nokomis Modern Tudor project
Real-Life Palettes We Love
Paint colors always look different in real life, which is why we love sharing the palettes we’ve actually used in our own projects! These combos show how rich hues, soft neutrals and bold accents come together in old homes we’ve worked on.
East Isles Victorian
The paint color selections in this home were made by Yond Interiors in collaboration with the homeowner.

Bathroom
Walls/ceiling: Skimming Stone (F&B)
Vanity: Brinjal (F&B)
Beadboard/trim: Elephant’s Breath (F&B)

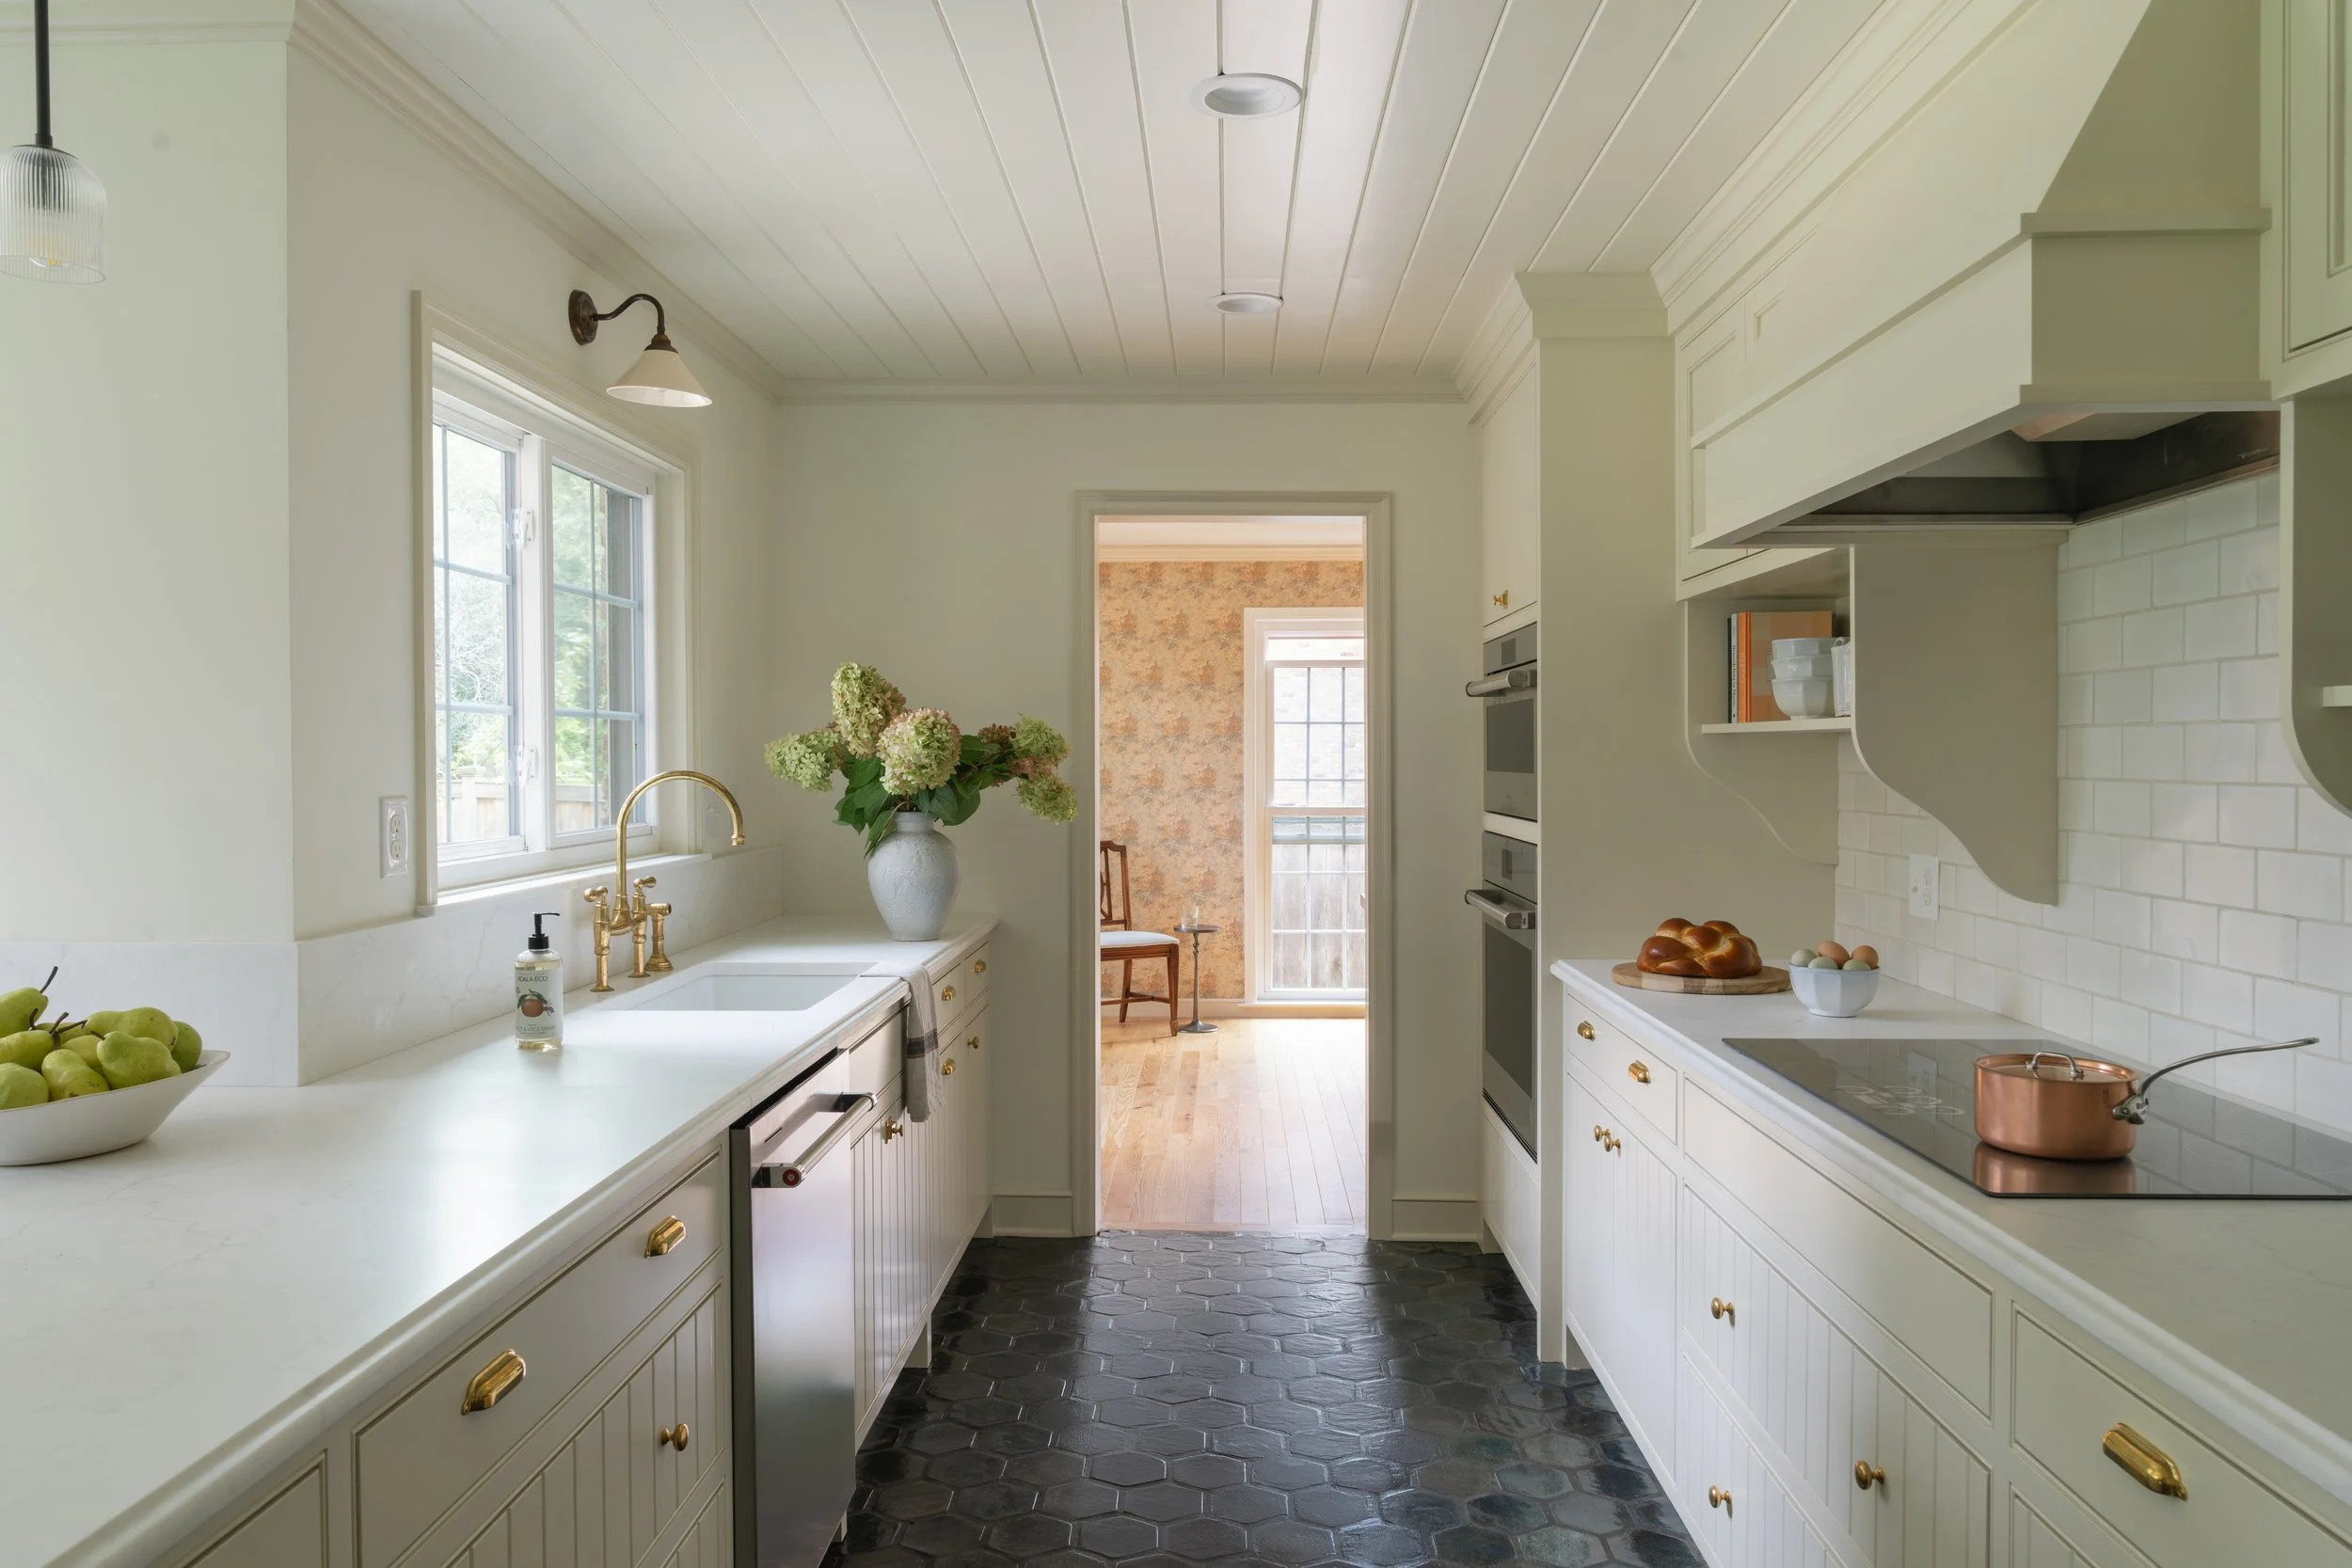
Kitchen
Marmorino plaster walls: Drift of Mist (SW)
Cabinets: Metropolitan (BM)
Island: Etruscan Red (F&B)
Lyndale Craftsman

Kitchen
Walls/ceiling: Collectors Item (BM)
Cabinets: Oil Cloth (BM)

Dining Room
Walls: Knoxville Gray (BM)
Ceiling: Edgecomb Gray (BM)
Living Room
Sun porch: Pine Grove (BM)
Living room walls: Edgecomb Gray (BM)
Common Paint Questions We Get
Should I paint my original wood trim?
Unless it’s already been painted, we always lean toward keeping wood trim stained. In our Lyndale craftsman remodel, for example, we repaired and refinished the original trim—and it’s gorgeous.
Warm or cool white?
It depends a lot on the light, and the same white paint will look totally different from room to room. North-facing rooms often do better with warmer whites (Alabaster, Swiss Coffee, Greek Villa) to neutralize blue undertones. Bright, south-facing rooms can handle cooler whites better (Snowbound, Wevet).
Will dark colors make my room feel smaller?
Not necessarily. Dark hues can make spaces feel sophisticated, intentional and cozy, especially with good lighting and contrasting trim.
Do the ceilings all need to be white?
Nope. We’re big fans of color-drenching (ceiling, trim and walls all one color), and it works well in many styles of homes. The ceiling can also be a place to do something with personality, like buttery yellow in an otherwise white room. If you are going with white ceilings, you don’t need to use the exact same color of white for every single ceiling in your house, either.
Do I have to stick to historic colors?
Not at all! Historic palettes—like the earthy Craftsman tones or jewel-toned Victorians you’ll see in heritage collections from paint brands—are a great reference point. (We love the Historic Color Collection from Hirshfield’s.)
But your home doesn’t have to live in the past. We think of color as a way to honor the bones of a house and bring in your personality. Sometimes that means a period-appropriate hue; sometimes it means the moody teal you can’t stop thinking about.
How do I test a paint color before committing?
Lighting and finishes change everything, so it’s worth taking the time to test. We recommend painting large swatches (at least 2x2 feet) on a sample board instead of directly on the wall. You can move it around to see how the color shifts in different light—and you’ll avoid having to sand the wall smooth later.

East Isles Victorian project
Whether it’s a dusty green, a soft off-white or the perfect unexpected accent, the right paint can make your home feel both fresh and timeless. And trust us, we have so many fun paint colors up our sleeves!
If you’re planning a bigger remodel, paint is just the start. We love helping homeowners pull everything together—colors, finishes, layouts—so the end result feels both true to your house and perfectly suited to the way you live today. Learn more about our design-build services.

How To Make Your Old Home More Energy-Efficient
Smart ways to improve efficiency without sacrificing style.
We love old houses. But we don’t love watching heat (and money) leak out the windows all winter. If your home was built before energy efficiency was even a concept, don’t worry: there are smart ways to make your home far more comfortable—and less expensive to run—without losing the character that drew you to it in the first place.
At Tusk Builders, we work on older homes every day, and energy upgrades are one of the most impactful investments you can make. Here’s where we typically see the biggest opportunities—and how we balance efficiency with charm.
Why Older Homes Are Less Energy-Efficient
Old homes weren’t built with modern energy standards in mind—but that doesn’t mean the people who designed them weren’t thinking about comfort.
In fact, many Victorian- and early 20th-century homes were built to be efficient for their time. Radiators offered steady, even heat. Floor plans encouraged air flow in the summer. Stained glass softened light and filtered heat. And shutters weren’t just decorative—they served as practical climate control. Solid paneled shutters helped with shade and insulation, while louvered styles let in breezes while blocking direct sunlight.
The problem is that what worked then doesn’t always work now. A few usual suspects:
Single-pane windows that let heat escape and cold air creep in.
Little to no insulation in attics, basements and walls (sometimes even newspaper, which was a common low-cost insulator in the 1920s and 1930s).
Gaps and cracks around doors, chimneys and foundations.
Outdated heating systems that work overtime to keep up with Minnesota winters.
The result? A home that’s harder to heat and cool, and expensive to run. On the upside, there’s plenty of room for improvement! Thoughtful upgrades can transform a drafty old house into one that feels modern in comfort and performance, yet timeless in character.

Start with the Envelope: Windows & Insulation
Think of your home’s envelope (walls, windows, doors, roof) as its winter coat. If it’s full of holes, all the heating (and cooling) in the world won’t keep you comfortable.
One of the single biggest upgrades? Replacing old windows with high-quality double-paned options. In our Modern Tudor project, we installed Pella double-pane windows, which not only improved insulation but also cut down significantly on airplane noise in the area. These particular windows use a variable-thickness glass pane that interrupts sound vibrations, making the home both quieter and cozier.
We also use spray foam insulation around the perimeter of new windows, which helps eliminate drafts and strengthens the overall house envelope.
Another game-changer is closed-cell spray foam insulation. It’s a dense material (think: the inside of a Yeti cooler) that works as both a vapor barrier and an insulator. Sealing up tiny cracks and air leaks keeps conditioned air inside where it belongs—helping your home use far less energy for heating and cooling.
While older spray foams earned a reputation for being environmentally harmful, today’s eco-friendly spray foam insulation products have come a long way. Newer options, like Natural Polymers HFO, contain fewer harmful chemicals and are safer for both people and the planet. We prefer working with these modern formulations for obvious reasons: they deliver powerful performance without compromising environmental responsibility.
Mechanical Upgrades That Make a Difference
Once your home is buttoned up, it’s time to look at the systems that heat your house and deliver hot water. We often recommend:
Power vent water heaters: more efficient than traditional models
High-efficiency gas furnaces: especially useful in Minnesota winters
Cold-weather heat pumps: newer models can provide both heating and cooling, even when temps dip close to 0°F. They’re especially effective during Minnesota’s shoulder seasons, when you don’t need the furnace running full-blast but still want reliable warmth.
Together, these upgrades don’t just lower utility bills—they dramatically improve comfort. You’ll notice fewer temperature swings, more consistent heating and cooling, and less humidity fluctuation throughout your home.

Balancing Charm with Efficiency
One of the joys of living in an old home is its original details—leaded glass, wood trim, quirky nooks. We believe in protecting those whenever possible. But sometimes, preserving original features means making thoughtful trade-offs.
A good example: In our East Isles Victorian project, the home has an original stained-glass piano window in the now-remodeled kitchen above the sink. It was always going to stay in its place, but extra insulation was added around that window and into the surrounding walls after we opened up the space. Two Anderson windows were added to that room, and the new and the old coexist beautifully.
Our rule of thumb? Prioritize upgrades where they’ll make the biggest difference (windows, insulation, mechanicals) while being selective about architectural details that give the home its soul.
Other Smart Upgrades to Consider
Not every energy efficiency project has to be a major renovation. Here are a few smaller swaps and updates that can still make a meaningful difference:
Programmable or smart thermostats: Heat and cool your home only when you need to for energy and cost savings.
LED lightbulbs: A simple swap with a big impact on long-term energy use.
Energy-efficient appliances: From dishwashers to washers and dryers, upgrading outdated appliances can cut utility costs.
Low-flow fixtures: Look into showerheads, faucets and toilets that use less water without sacrificing pressure or comfort.
Electrical panel updates: If your home’s panel is outdated, upgrading can open the door for modern systems like EV chargers, induction ranges or future heat pump installations.
Solar panels: For homeowners ready to go further, solar can significantly reduce reliance on grid power, especially when paired with other efficiency improvements.
How to Approach Energy Upgrades in an Old House
Energy efficiency upgrades don’t have to happen all at once. Start with a plan:
Get a home energy audit (or blower door test). These assessments pinpoint where your home is losing the most energy, so you know what to tackle first.
Work with professionals who understand old homes. Older houses are quirky, and cookie-cutter solutions don’t always fit. We know how to balance original charm with modern performance.
Layer efficiency upgrades into larger remodels. If you’re already opening up walls for a kitchen renovation or replacing siding, it’s the perfect time to add insulation, update windows or upgrade systems
Explore tax incentives and rebates that might be available to you in your state. These can change from year to year.
Every old home is unique, but if you’re looking for a simple roadmap, here’s how we usually recommend approaching energy efficiency projects:
Seal the envelope: Address insulation, windows and doors.
Upgrade mechanicals: Invest in efficient heating, cooling and hot water systems.
Make smart swaps: Layer in lower-cost upgrades like weatherstripping, LEDs or new appliances.
Preserve character: Keep or restore unique architectural elements that make your home special.
Together, these steps create a clear path to a home that’s more efficient, comfortable and still full of character.

Energy efficiency might not be as exciting as a kitchen remodel, but it’s one of the smartest investments you can make—for your comfort now and your resale value later. More and more buyers are looking for efficient homes, which means the work you put in now doesn’t just pay off on your utility bills, but it also helps your home stand out if you decide to sell down the line.
Planning a remodel? We’ll help you strike the right balance of comfort, energy efficiency and character. Let’s talk.

10 Ways to Modernize an Old Home—Without Erasing Its Character
Thoughtful updates, timeless charm. Here's how to remodel an old home without messing up the good stuff.

There’s nothing like the charm of an old house: original wood floors, unique built-ins, stories in every corner. In Minneapolis, that charm runs deep—the median home age is about 75 years old.
Of course, with that vintage beauty often come tricky layouts, drafty windows and a long list of repairs. The key to a successful old home renovation? Making thoughtful upgrades that improve how your home functions and feels—without compromising the things that make it special.
Most people don’t want to live in a museum, but they’re also not sure how to bring in modern updates without messing with the magic. That’s where a little strategy—and a lot of respect for the original details—goes a long way.
At Tusk, we believe your home’s history and future can coexist. Whether you’re planning a full remodel or just refreshing one room, here are our go-to tips for renovating an old house while celebrating (and leaning into) its character.
1. Understand What Makes Your Home Unique
Before diving into renovations, take a moment to really notice what makes your home special. Is it the original wood trim that frames every room? The stained-glass windows that catch the light just right? A fireplace with years of stories built into its bricks? Or maybe vintage tilework that adds a splash of color? Knowing what’s worth protecting will guide design decisions and ensure you don’t accidentally strip away the charm you fell in love with.
If your home has been renovated by a previous owner, there also might be some “unique” changes and features that you want to undo. If that’s the case, check out a few home listings and open houses of similar houses in your city to collect ideas for layout, design and features that would’ve been original to yours—and the ways others have updated these spaces over the years. We like to think about updates in a way that feels cohesive with the rest of the home: it’s new, but it’s as if it was always meant to be there.
2. Keep Original Woodwork and Trim Whenever Possible
In many pre-1970s homes, the wood trim wasn’t mass-produced; it was custom-crafted for the space. That kind of detail is hard (and expensive) to replicate today. Whenever possible, restore and refinish original baseboards, crown molding, window casings and door frames instead of replacing them. If pieces are too damaged or missing, a skilled carpenter can match the species, profile and proportions to blend old and new seamlessly.
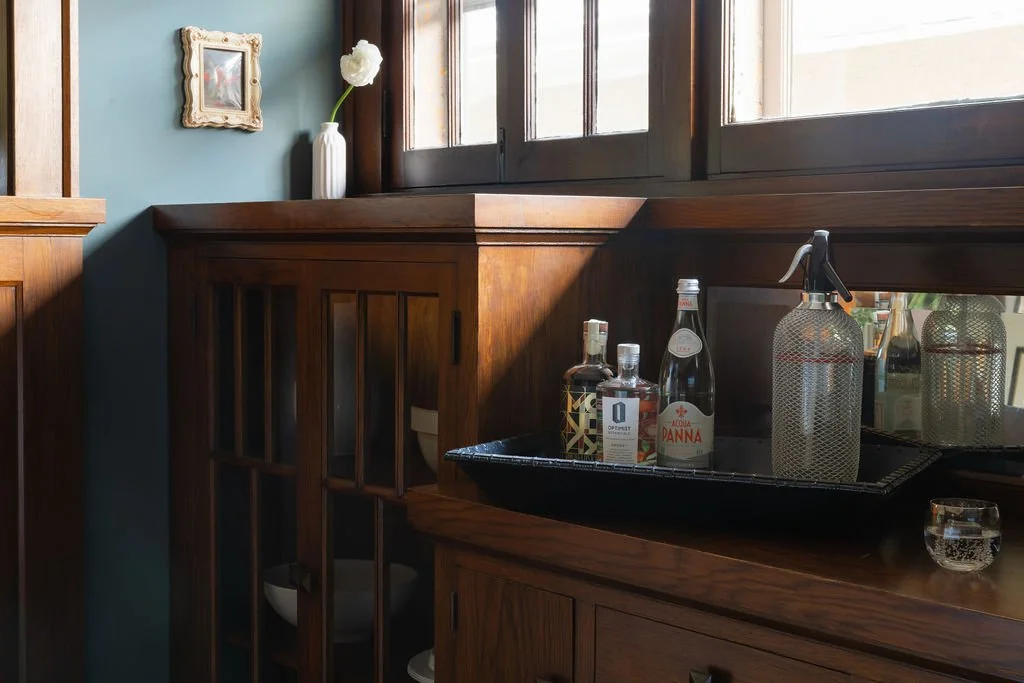
3. Restore or Repurpose Vintage Built-Ins
Built-in cabinets, bookcases, hutches and window seats aren’t just functional—they’re full of personality. If they’re looking rough, refinishing or repainting will go a long way. You can also reimagine their purpose: turn an old buffet into a bar, add a coffee station to a butler’s pantry, or transform a window seat nook into a cozy reading spot with added cushions and lighting.
4. Match or Replicate Historic Fixtures and Hardware
An aged brass doorknob worn smooth by decades of use, a creaky-but-beautiful hinge that’s been there longer than any of us—these small elements add up to a home that feels storied and soulful.
If you’re lucky enough to have originals, consider them treasures worth saving. If not, architectural salvage shops in your area are likely to have hardware that will feel right for your house (we love Architectural Antiques in Northeast Minneapolis).
If you need to buy new, you can also find era-appropriate reproductions out there from specialty suppliers. Coordinating finishes and styles throughout your home helps everything feel intentional and cohesive, keeping that old-house charm intact right down to the doorknobs.
5. Maintain or Recreate Original Flooring Patterns and Materials
Original hardwood floors bring serious character, but not all can be saved. If your flooring is in decent shape, refinishing can restore its warmth and depth. Even worn or uneven boards can often be salvaged with a good sanding and a durable finish.
If boards are too damaged or there's patchy replacement work from past renovations, replacing with wood in a similar species, width and finish can preserve the look. For tile, you can often replicate historic mosaic patterns using modern materials that nod to the original style.
When in doubt, keep it consistent across visible areas—continuity in flooring goes a long way.
6. Open (or Not) Thoughtfully
Older homes often follow a different logic than today’s open floor plans, but that doesn’t mean you should blow out every wall (some houses are just meant to have rooms!).
If you’re craving more connection, consider strategic tweaks that preserve your home’s original charm. Widen doorways to improve flow, create new sightlines between rooms or partially open shared spaces while keeping key features like archways, niche walls and ceiling medallions intact. Often, it’s the original rhythm of a home—the way rooms connect, the proportions, the quirky transitions—that gives it character. Maintaining proportions and transitions where it makes sense can help your home feel authentic, even as you adapt it for modern life.

7. Use Era-Appropriate Paint Colors and Finishes
Color is one of the easiest ways to reinforce a home’s age and style. Research historic palettes from the time your home was built, or work with a designer (hi!) with experience in vintage homes.
Use matte or eggshell finishes to mimic the soft, light-absorbing surfaces found in vintage interiors. And consider natural finishes like milk paint, Marmorino plaster or limewash for added authenticity and texture if that’s right for the age of your home.
Wallpaper is another great way to nod to the history of your home—there are prints and patterns for every decade.
8. Upgrade Systems Discreetly
Yes, you’ll likely need to update plumbing, electrical and HVAC—but thoughtful integration makes all the difference. The best time to tackle these upgrades is when the walls are already open during a reno, and an expert remodeler can help you seamlessly fold new systems into the old bones. Run new wiring behind trim, conceal ductwork in closets, and choose vent covers or switch plates that suit your home’s style. A vintage house can be a smart house!
9. Incorporate Modern Conveniences With Care
Most of our clients don’t want to live in a time capsule—but they’re not always sure how to bring in modern comforts without disrupting the character they love. The key is to weave in upgrades in ways that feel subtle, thoughtful and in tune with the home’s vibe.
Look for appliances with classic styling—a stove with vintage-inspired knobs, or a fridge with a clean, simple design. And for tech, keep it low-key: hide wiring inside walls, tuck speakers into built-ins or use sleek, minimalist controls.
10. Work With Pros Who Know Old Homes
Restoring and remodeling a vintage home takes more than just skill—it takes patience, care and a deep appreciation for how these places were built. At Tusk, we specialize in older homes because we love the stories they hold—and the challenge of helping them live on. Whether you’re renovating for comfort, function or energy efficiency, we’ll help you do it in a way that honors your home’s history and personality.
Love your old house, but ready to make it work better for you? That’s kind of our thing. Learn more about our design-build services.

2026 Kitchen Remodel Budget Guide (With Project Cost Estimator)
Planning a kitchen remodel in the Twin Cities? Get clear on costs to expect—and how to invest wisely.
You’re dreaming of a better kitchen—more space, better flow and maybe even a layout that makes sense. But when you start Googling “kitchen remodel cost Minneapolis,” the numbers are all over the place… and not all that helpful.
The truth is, the cost of a kitchen remodel depends on a variety of factors: how old your home is, how much you’re changing, what kinds of materials you choose and more. And in the Twin Cities—where homes range from 1900s foursquares to midcentury bungalows—no two projects look the same.
To help you get a clearer starting point, we created the Kitchen Remodel Cost Estimator below. It's based on the types of projects we complete throughout Minneapolis and St. Paul and can provide a realistic budget range based on your goals.
Below, you'll also find average cost ranges, key factors that impact pricing and real examples of kitchen remodeling budgets—so you can better understand what drives the numbers and what might make sense for your home.
Whether you’re in early idea-gathering mode or getting serious about starting construction, we hope this helps you feel more informed (and more confident!) about planning a remodel that fits your home, goals and budget.
Average Kitchen Remodel Costs in Minneapolis
According to the National Kitchen & Bath Association’s 2026 Kitchen Trends Report, the average kitchen remodel in the U.S. costs $71,159 for medium-sized kitchens and $137,228 for large ones.
Kitchen remodels in the Twin Cities tend to run higher than the national average, typically ranging from $50,000 to $200,000+, with the average landing around $160,000. We know—that’s a wide range, so let’s break it down:
Small Remodel: $50K–100K
Keep your existing layout, update finishes and fixtures, upgrade appliances, and maybe new flooring and countertops.
Mid-range Remodel: $100K–$175K
A full gut: new layout, custom cabinetry, upgraded finishes, all-new everything.
High-end Remodel: $175K+
A completely reimagined space with all the bells and whistles: structural updates, custom everything and top-tier materials.
For many older homes, we see budgets land in the mid-to-high range. That’s often due to structural updates that require relocating mechanicals, as well as the need for custom cabinetry to fit unique layouts. But with the right planning, those challenges evolve into custom design moments that make your kitchen one-of-a-kind!

What Affects the Cost of a Kitchen Remodel?
Project Scope
The project scope answers the question “what are we doing?” Are we just swapping out surfaces, or moving walls and plumbing?
Layout changes, like relocating your sink or knocking out a wall, will almost always increase costs.
Structural work—like removing load-bearing walls, reconfiguring windows and building additions or cantilever “bump-outs”—adds both time and expense.
Mechanical systems like plumbing, HVAC and electrical often need to be updated or rerouted in old homes.
Custom cabinetry is often necessary to fit quirky layouts and uneven walls.
Longer timelines = higher labor costs and more time living in a construction zone (or out of your house).
Pro tip: Planning to remodel your kitchen, and eyeing that outdated mudroom or bathroom, too? Bundling projects can be a smart budget move. You’ll often save on labor costs, and you’ll only have to live through the dust once.
Home Age
We love working on old homes, but they do keep you on your toes. Here’s how historic character (and the aches and pains that come along with it) may impact a kitchen remodeling budget:
Outdated plumbing, HVAC or electrical may need upgrades
Uninsulated walls or hidden damages are common
Custom details (original trim, doors, flooring, windows, exterior features) often need to be matched or recreated—sometimes by a trade specialist.
Choosing a team that specializes in older homes (that’s us!) can help ensure you’re budgeting realistically and navigating any surprises with confidence.
Square Footage
The size of your kitchen plays a big role in the overall cost. Larger kitchens require more materials, more labor and often more complex planning. Even in smaller kitchens, maximizing every inch with custom solutions can add to the investment! Whether you have a cozy galley or an expansive open-concept space, understanding how square footage impacts pricing will help you set realistic expectations and prioritize your goals.
Design
Cabinetry is often the biggest-ticket item in a kitchen remodel, and for good reason. It sets the tone for your entire space, impacts how your kitchen functions and plays a big part in how it feels day to day. We always recommend investing in custom cabinetry, especially when working with tricky existing layouts in older homes. Custom allows for a tailored fit, smarter storage and thoughtful design details that elevate both form and function. It’s a long-term investment in quality craftsmanship, durability and everyday ease.
Beyond cabinetry, it’s important to plan for design as its own budget category—separate from construction. Full-service design fees typically run 5–15% of the total project cost, depending on the complexity and level of support. That includes layout planning, material selections, sourcing and helping you make decisions that align with your goals and budget.
Materials
Countertops, tile, hardware, light fixtures, even things like switchplates… these are the details that bring a kitchen to life. Materials have a wide price range, but they’re also where savvy choices and value-engineering can go a long way.
We help you figure out where to spend (like that show-stopping tile you’ve been dreaming about) and where a more budget-friendly option will do the trick without compromising function or the overall vision.
Labor & Permits
Labor is an important line item—and it varies depending on project size, trades involved and timeline. Almost every remodel involves a whole crew of skilled professionals: plumbers, electricians, HVAC specialists, cabinet builders and installers, painters, framers, drywallers, flooring experts, tile installers and more. With so many experts involved, labor naturally makes up a big portion of the project budget.
Permit fees vary by neighborhood. Older homes may need extra inspections or require engineering, especially if you’re making structural changes. It’s not the glamorous part of remodeling, but it’s essential for safety, legality and peace of mind.

Real Minneapolis Kitchen Remodel Examples
Budgeting can feel a little abstract—until you see what the numbers actually look like in real homes. These are just a few kitchens we’ve remodeled across different ranges. While every home and project is unique, this should help give you a ballpark idea of what real kitchen remodeling budgets look like in the Minneapolis-St. Paul area.
Our process starts with getting clear on your budget goals and helping you design a project that fits within that scope. We don’t jump into construction until we’ve mapped out all the costs during our pre-construction planning process, where we build your project on paper. Because of that, surprises that add extra costs are pretty rare, so you can relax knowing what to expect.
Small Remodel ($50-100K)
South Minneapolis 1920s Craftsman: This kitchen was a light, mostly cosmetic refresh that made a huge impact. We kept the layout, added custom-painted full overlay cabinets (and kept those beautiful original built-ins!), replaced the flooring and countertops, and updated fixtures throughout.
South Minneapolis 1919 Bungalow: This compact kitchen was ready to leave the 1970s behind. We kept the layout but gave the space a fresh, functional update with custom-painted full overlay cabinets, butcher block countertops, a classic white subway tile backsplash and refinished hardwood floors.
Mid-range Remodel ($100-175K)
NE Minneapolis 1920s Craftsman: This full gut remodel included a new floor plan, custom white oak cabinetry, a new pantry, upgraded windows and doors, hardwood flooring and new finishes that felt right at home in this 1920s gem.
St. Paul 1921 Tudor: This full gut remodel reimagined the layout to improve flow and functionality, eliminating awkward corner cabinets and making room for a larger island, walk-in pantry and wet bar. We refinished the original hardwood floors and added custom flat-panel white oak cabinetry with full overlay doors and panel-ready appliances for a clean, timeless look. A new kitchen window brings in more light, while quartz countertops, fireclay brick backsplash tile and updated lighting pull the whole space together.
High-end Remodel ($175K+)
Mendota Heights 1960s French Country: This high-end, full gut remodel stayed true to the home’s character while upgrading function and finishes. We kept the existing tile floors and mechanicals, but reworked the layout for better flow. Custom-painted cabinetry featured v-groove and shaker styles with beaded detailing, glass inlay and a red oak hutch. Panel-ready high-end appliances—including a steam oven—were paired with quartz countertops, stone and tile backsplashes and a wet bar with a custom copper sink! Millwork details like ceiling paneling and wainscoting added a refined, timeless touch.

Tips on Budgeting for a Kitchen Remodel
Start with the problems that need to be solved. Do you need more storage? Better lighting? Get clear on what’s truly important to you, whether that’s more space for cooking, better flow for entertaining or simply a kitchen that better reflects your design tastes. Having a solid list of priorities from the start helps guide decisions—and spending—as your project evolves.
Know your goals. If this is your forever kitchen, investing in premium materials and custom details can be well worth it. If you plan to sell in 5-10 years, focus on functionality, flow and resale-friendly upgrades.
Mix high and low (and even secondhand). Not everything has to be top-of-the-line to look and function beautifully. Maybe you splurge on quartzite countertops because you love to cook (and make a mess), but opt for a simpler backsplash or vintage lighting you find on Facebook Marketplace. Thoughtful mixing lets you put your money where it matters most to you—and still keep the whole space feeling elevated.
Think timeless, not trendy. It’s easy to get swept up in what’s trending, but remember, the goal is a kitchen you love that feels right for your home, not just what’s hot on Pinterest this year.
For example, white oak cabinets are wildly popular right now—light, clean and not too yellow. But trends evolve, and alternative woods like birch, cherry, alder, hickory and red oak can feel just as warm and fresh when used thoughtfully. And if you prefer a more modern look (especially in a mid-century modern home), pre-finished laminates and melamines offer sleek lines and cost-effective style.
Bottom line? Let your home (and your taste) lead the way—not just what’s currently filling your feed.
Have a solid plan. Most of the big decisions, like layout and material selections, should be made before construction begins. That way, you’re not scrambling mid-project or facing costly changes down the line. Our Pre-Construction Plan is designed to make sure the critical details are buttoned up before we break ground. From layout to finishes, we walk through it all so you can feel confident in your choices, your budget, and the process ahead.
Hire a design-build team. We’re biased, but for good reason! Having your design, construction and budget planning all under one roof means better communication, more accurate pricing upfront and fewer surprises mid-project. It also means your home is being looked at holistically—not just as a checklist of tasks, but as a cohesive space with a story to tell.
Build in a buffer. Set aside 10-15% of your total budget for the unexpected. Especially with older homes, this financial wiggle room gives you flexibility to adapt. And if you decide to add an upgrade or make changes once demolition starts, we can easily adjust to keep things moving on schedule.
Beyond a contingency fund, there are a few other costs worth planning for up front:
Design fees: Investing in good design and a solid plan may feel like an added expense, but it pays for itself by preventing costly mistakes and ensuring your remodel runs smoothly.
Temporary housing: For a full kitchen remodel, we usually recommend moving out while construction is underway. It makes daily life easier for you and helps the crew work more efficiently.
And if the costs feel like too much of a stretch, it’s okay to wait. Cutting corners or downgrading materials often leads to regret later on. A kitchen remodel is a big investment—and it should feel exciting! Wait until the timing’s right so you can do it once, do it right, and love it for the long haul.
The process can be complex—and yes, the investment is real—but a well-designed kitchen remodel pays you back in countless ways. After all, it’s where you start your day, where your people gather and the backdrop for everyday life in your home. With thoughtful planning, smart budgeting and the right team, you’re investing not just in a space—but in how you experience and enjoy your home every day. So worth it.
Need help planning your remodel? We’d love to learn more about your space, your budget, your vision and how we can help bring it to life. Whether you’re gathering ideas or ready to dive in, let's talk.